3D Printing Part I – The Basics
My Printer: MonoPrice Maker Select V2
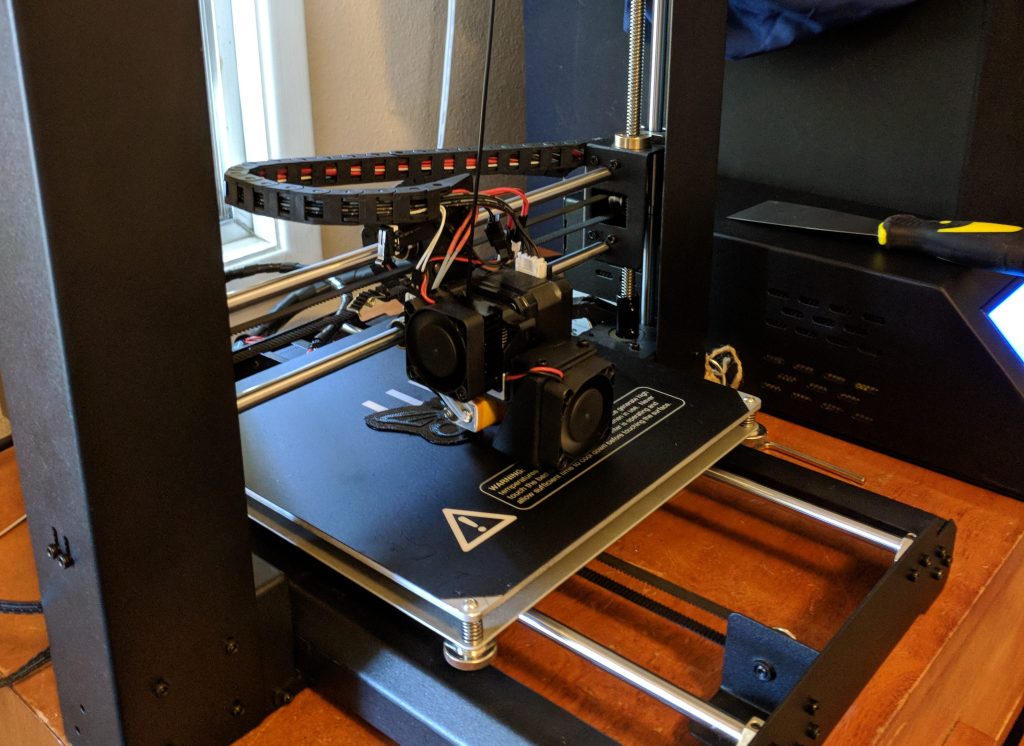
I am currently using a Monoprice Maker Select v.II. I have removed the default build surface and added borosilicate glass with silicon thermal pads to the headed aluminum gantry. I plan on replacing the Y-axis gantry as well. There are thicker blocks of milled aluminum online.
- Brand new Monoprice Maker Select V2
- Here is the entire printer
- Printing PCI blanks.
- X, Y, Z axis in relation to the print surface.
Learning about 3D Printing
Note: This is not meant to be a full guide, this is just my process of learning about 3D printing. You will need additional resources and should do ample research before attempting 3D printing. It is unfortunately still in the early adopter phase.
3D printing is an awesome way to prototype and makes some pretty cool things quickly. It has the ability to change the way we think about creating objects the home printer has in modern households. It won’t replace it, rather it will work alongside it.
Basics of 3D Printing
3D Printing is accomplished through depositing layers of a material down in increments. The total sum of all the layers(X and Y) is the final 3D object. Below are the mechanics of a basic 3D printer based on the first model of the Prusa i3.
Several important steps are required to 3D print a model. Basically, the model must first be loaded into a slicer. This slicer takes the model and computes the fastest way for the nozzle to deposit the material along with any support structure if needed. It stores the file as a GCODE, and inside are the basic movement instructions for the microcontroller inside.
Printing Mechanisms
XYZ Mechanisms
Usually, there is a moving base that controls the Y axis, the X axis is controlled by a sliding mechanism(on the Z-axis gantry) and the Z axis moves the whole X-axis gantry upwards. This means that X and Z create a plane where Y (the baseplate) is the moving part that is being printed too.
The X-Axis uses a belt and slider mechanism to move along the Z-axis gantry. It must be manually leveled and calibrated with the Z-axis threaded rod.
The Y-Axis uses a belt and two rods on a slider. The Y-Axis contains the baseplate and its heating components if present.
The Z-Axis uses twin stepping motors connected to two threaded rods to give it precise lift. It contains both the X-Axis and the Nozzle.
Extrusion nozzle
The Nozzle mounted on the Z-Axis gantry is responsible to the depositing of the plastic material. It does this using a small gear assembly connected to a stepper motor. This allows a precise amount of material to be deposited, known as the Extrusion rate.
Extrusion rate is dependent on the speed of the nozzle with relation to the baseplate. Temperature and filament often make a significant difference of the operating nozzle temperature. Some filaments use custom GCODE(Low-level code) to change the temperature in small calibrated amounts. Chemicals inside the filament react to this change by turning to a desired, usually pre-calibrated color. This is most often utilized by wood filaments to emulate the natural rings that form on wood as it weathers the seasons.
Motor Control
Motor Control is attained through a central box combining both a microcontroller and a DC power supply. This combination allows for a compact, easy to manufacture component but is the one flaw of this specific (MP Maker Select V2). Inside lie a large fire hazard and vulnerability. The connector for the heated base plate is not rated to draw the amount of current required. This has caused numerous people to watch as smoke pours out of their unit. The overload caused the connectors to smolder and melt. See This for more and see This for the MOSFET correction, which resolves this issue.
The motor control box generally supports two methods of connecting SD Card, and direct control. Direct interfacing with a computer will show it as an Arduino. The computer has control over the Microcontroller and is able to run whatever it likes. This allows for use of Raspberry Pi computers to directly control the 3D printers movements. All of this requires the model to be sliced into a GCODE file by a slicer
Bed Leveling, Calibration, Settings
This is by far the most tedious part of dealing with a cheap 3D printer. Many new expensive printers auto level and have calibration options that negate this issue. It is normal for this process to take multiple hours if you have a bent baseplate or are just unlucky. It is a very precise process that lacks any sort of accuracy.
In this post, I don’t want to delve into those specifics as they are just busywork and practice. Here is a VERY helpful video on leveling your baseplate and ensuring the X-Axis is ready to go. He also gives some nice starter print mods such as the thumbscrews.
Slicing a model into GCODE
In order to 3D print a model, it must first be sliced into a GCODE. This GODE contains the direct motor movement instructions for the microcontroller to interpret. That is why it is critial you only use GCODE files configured for your printer, otherwise your printer may attempt to operate outside of its parameters.
The Slicer I use is called Ultimaker Cura. It has most features of the paid (and expensive) competitors. There is a default configuration in Cura called “i3 Prusa”. This configuration works perfectly for the MP Maker Select V2 I owned as it is a clone of it. Most clones will work fine with the same settings so long as they are a bit slower.
Ultimaker and most other Slicer programs use something called an STL file as input. This is a standard AutoCAD mesh and most modeling software can output directly to them. Conversion solutions are readily available for everything else.
Uploading a GCODE to the printer
Once a GCODE file is generated, it must be uploaded to the microprocessor on the 3D Printer.
Using an SD card – Most printers will allow you to select it from an interface for printing.
Using a USB interface – Most printers will show up as an Arduino computer. By opening the slicer and pressing ‘Print’ with the correct interface selected the 3D printer will begin printing. During this process, the computer is directly controlling the movements of the motors and must remain on with the slicer open.
That should do it! That is all a basic print needs. In a future article, I will be outlining the process of adding a small SoC such as a Raspberry Pi 0 to control the printer with a web interface. This will remove the need to upload any sort of GCODE to the printer.
