Hosting a full website with root/shell access for under $15/Year


Hosting, specifically, web hosting is a very misunderstood and often overlooked industry of the internet. Too often people pay prices far in excess of what the actual service costs, while at the same time under-utilizing features provided by that very same price hike. This leads to expensive websites whose owners don’t have full control over the content being hosted.  However, it is possible to completely go around web hosting companies while still remaining cheap and reliable. In this post, I will attempt to explain the different “tiers” of hosting and how to best utilize them.

Three tiers of hosting

There are three basic tiers we need to know about. These aren’t official by any capacity, but they are a good representation of what is available to the consumer in the industry. Listed in order of Highest Cost: Hosting Ability ratio.


The reason Tier I is skewed into II and III is because people can and do host Paneled solutions inside a VPS.


  1. Paneled/Sandbox hosting

    1. This is the type of hosting that often uses a management panel such as CPanel to administer content. This allows web admins to manage basic websites and databases. Shell access is often limited or even non-existent. Limiting backend scripts to whatever is on the panel at the time.
    2. This method of hosting is akin to a can of sardines. Generally, there will be thousands of low traffic websites on a single server with the panel separating and hosting their content dynamically. This causes both security and speed concerns. There have been cases in the past where database corruption lead to users being able to access other users content. Often a shared IP address is used and content fetched based on what domain requested it. This could lead to false associations between companies/parties. Imagine if “Anti-Abortion Inc.” and “Planned Parenthood” are found to be sharing a common IP. Same host, different people but on paper, it could look like they are both the same entity.
    3. Costs between: $5-$10/Month or $60-120/year
  2. VPS hosting

    1. This is a subdivision of the 3rd tier “dedicated server” type hosting. It is able to also preform all the duties of a Paneled host.
    2. A VPS is a visualized instance of a physical server. All aspects of the software are open to the web admin and root access is generally given.
    3. As it acts as a stand-alone server, HTTP serving software such as apache2 or Lighttpd must be installed and configured to serve pages. PHP and MySQL are also generally needed for dynamic content generation.
    4. Two major types of container:
      1. OpenVZ
        1. Runs using portions of the hosts Linux subsystems. Can only run Linux distributions. Root access is still given and the container acts as a standalone system.
        2. Allows over-allocation of RAM (RAM is not reserved)
      2. KVM
        1. Runs under a host hypervisor.
    5. Can run many websites at once.
    6. Costs between: 1.5$-5$/Month or $15-$60 per year on the low end.
  3. Dedicated Hosting

    1. This is a physical machine. All access is granted to the web admin.
    2. The other two tiers are slices of this.

Choosing a tier and host

VPS Hosting is the best choice if you are able to figure out the initial configuration. It’s much cheaper than Paneled hosting while at the same time giving much more space, features and resources. Dedicated Servers are not required unless serious traffic is being pushed. If you have to ask if you need one, you likely don’t.


Choosing a host is probably one of the most annoying tasks a web admin will deal with. There’s no central directory of reliable hosts. Many cheaper hosting companies end up closing 2-3 months later after barely offering a service at all. Because of the lack of central directory, its difficult to distinguish hosts like this, from reputable ones.

Communities such as http://lowendtalk.net offer a good view of what’s available and general opinions of companies. Unfortunately, new hosts reliability cannot be tested by anything other than time, so it suffers from a litter of hosts that look to operate well but are unsustainable in the long term.

A decent cheap host I have found is https://buyvm.net/. They have been stable for years and offer some of the most competitive small VPS pricing I can find. Their openVZ containers are $15.00/year and can run almost any small/medium sized website. I will be using them for this post.

Purchasing

Once deciding on a host and tier, you need to choose what configuration you want.

Generally, you will be offered two choices: OpenVZ, or KVM. OpenVZ is cheaper but lacks RAM reservation and hypervisor level emulation. KVM is more expensive but completely isolated with dedicated resources.

For this tutorial, I will be using an OpenVZ, $15 a year container. It contains 10GB of storage, a lot of bandwidth, and 128mb of ram. Considering on OpenVZ much of the system RAM is freed up as its running on the host outside the instance, this is actually quite usable.

Configuring a VPS Container to be used as a website host

Once you have your VPS purchased, it needs to be configured to support web traffic. This is done by installing a web server and related components.

For Debian based installations

 Installing the Web Server (Apache2)

  1. Load up the container console via the host’s web interface, or SSH into it if you were given the login information on registration. It should display a screen that says root@(your hostname).
  2. Type: sudo apt-get install apache2 and enter your password when prompted.
  3. Once the installation is complete, navigate to your containers IP address (Listed on the host’s website). You should see a default apache page.
  4. Apache will serve the content located at /var/www/*
  5. If you just want to host static HTML/CSS Content, then you are done! Apache2 will run as a service on startup. Just place your content inside /var/www/

It’s as simple as that. Now the VPS will host the content indefinitely. In another post, I plan on outlining WordPress and MySQL for those that want their content to be a bit more dynamic. The VPS can also be used to host game servers such as Minecraft and Factorio.


At $15/year, this is an easy set and forget solution for a small website and a no-brainer for someone who has the time to set it up.


Updated: September 5, 2018 — 3:59 am

5km point to point Internet without Line of Sight

Creating an internet connection across San Diego with no Line of Sight (LoS).


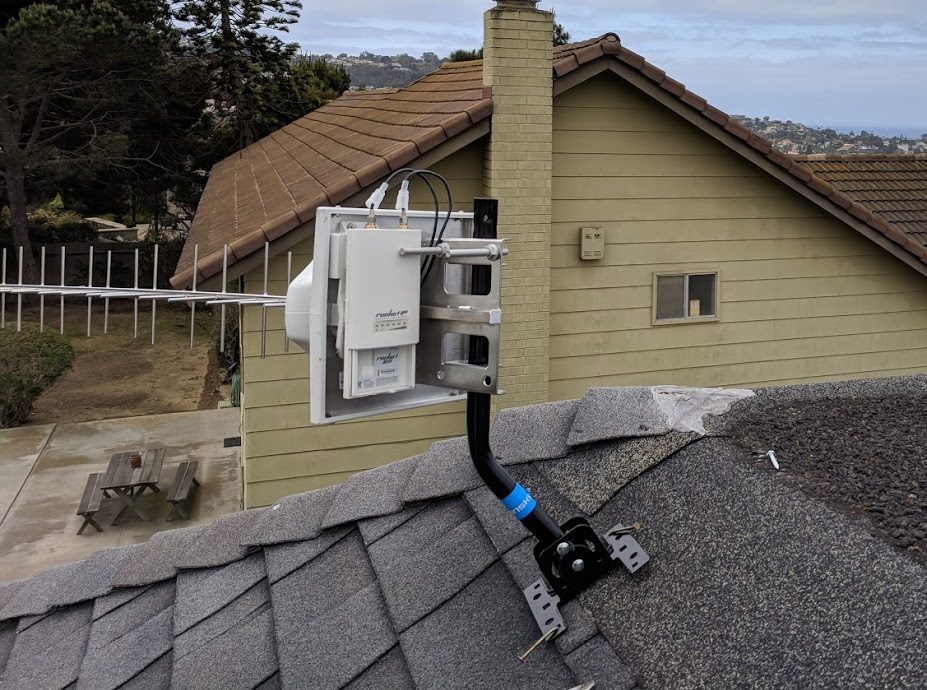
This project utilized two Ubiquity 900Mhz radios to accomplish a Point to Point link between a building in North La Jolla, and a building in Clairemont. This was about a 5km distance that needed to be bridged. The idea was to use my parents quick internet at my own house that could only use DSL. The project really wasn’t able to deliver on that front, as the throughput ended up being too low. Between the two properties lay trees, hills, other buildings and more. Making a normal 2.4 or 5ghz not viable as they don’t penetrate through obstructions well.

These radios establish a standard WI-FI network using normal protocols complete with an SSID and WPA2 encryption. The main difference being that it all runs over 900Mhz instead of 2400Mhz or 5000Mhz.


First Connection

It took a while to get first connection. At one point I became concerned the radios were defective as they would not operate in the same room. However, it turns out that the high gain was just too much if they are too close together. After climbing a tree and pointing the antenna where I [thought] its counterpart was I received a beep and a small red light lit up, indicating a connection with the other point. It was faint, wouldn’t stay connected and was too slow to load

First signs of life

the other antennas web interface. Through a mix of remote desktop, a hacked together network and messed up

First Connection: Weak but workable

subnet, I was able to have the antenna on the same network as the internet during troubleshooting.


Optimization of the link

After much trial and error and driving between the two points, I was able to establish a stable, albiet weak connection. Over the course of about a week, I did corrections to the antenna alignment and height/position. Moving it in both locations until I reached a level were I was satisfied it would not go any higher.

I then messed around with the channel width, and found that the larger channels actually limited bandwidth likely due to the obstructions weakening the signal if it is less concentrated over a larger area.


End Result

Finally, after a lot of tweaking I was able to reliably attain 10-15MBPS depending on the weather. This was usual

ly a pretty even split between up link and down link when tested. It really wasn’t fast enough to replace my DSL connection, and weather (specifically the marine layer at the La Jolla house) limited its reliability. I never ended up using it much, and it will probably go back to my previous employer when they have a use for it.


Updated: September 10, 2018 — 11:17 pm

Linux gaming VM: PCI-E Passthrough via KVM

Passing a GPU to a Virtual Machine for full performance

This is a documentation of my PCI-E pass through setup.

This projects goal was to allow me to use Linux as my main operating system, while still allowing me to play modern windows games outside of wine. To do this I configured QEMU on Linux to attach a PCI-E card, giving it almost native 3d performance. The below video goes into greater detail:

Note: 7B SYSTEM_THREAD_EXCEPTION Bsod is caused by nvidia detecting a virtual machine and killing the driver. Make sure you have cpu host config being passed to the KVM machine. I was not able to get this working using libvirt and virt-manager, which is why I created the shell script. If you are having issues with the aforementioned issue, mount your img to qemu directly using the following configuration fire and see if that works.

#!/bin/bash /usr/bin/synergys –daemon –config /etc/synergy.conf qemu-system-x86_64 -enable-kvm -m 2024 -cpu host,kvm=off \ -smp 4,sockets=1,cores=4,threads=1 \ -device vfio-pci,host=05:00.0,x-vga=on -device vfio-pci,host=05:00.1 \ -device virtio-scsi-pci,id=scsi \ -drive file=/home/dontpanic/vtw/windows.img,id=disk,format=raw,if=none -device scsi-hd,drive=disk \ -usb -usbdevice host:04ca:0061 \ -vga none

Updated: September 11, 2018 — 10:51 am

Rotting Bench Restoration

This is an old bench that is just about at the end of its life. I decided to see if I could restore it or at least get a little more use out of it before it finally collapsed into itself. This was a two day project that involved disassembly, repair,  sanding, painting, and sealing.

Bench Before Restoration


Process of Restoration

Check back here for a detailed walk through of the process I went through while repairing this bench.


Final Product


In the end I needed to use epoxy to bond parts of the bench that could no longer be screwed screwed into due to wood rot. Not really what I intended as I wanted the job to ‘be done right’. However, considering the poor condition of the bench, I can’t complain too much about the result

I’d say it actually looks pretty good.


Updated: September 3, 2018 — 5:07 pm

DIY Solar Cart: Cheap solar power

DIY Solar Cart: Cheap solar power

The Solar Cart Project started as a test of a solar panel. Simply run a single LED light in my room with an two alarm system 12v batteries in parallel. Giving a total of 12AH of power.

Here is the proof of concept back when I thought it would be a quick project.

Initial Proof of Concept


Besides the two 12V batteries the system also contained: A single 5amp inline automotive fuse on the positive end of the battery, a cheap PWM charge controller, and a 150W monocrystalline solar panel. This was all wired using 14AWG landscape wiring.

Upgrading to a central (wooden) chassis and adding fuses

Obviously this system can’t power much for very long, so I continued to expand it. I purchased a sealed 12v AGM 100AH marine battery and found a piece of wood to begin attaching more components on too. With such a large battery there is a greater chance of a short circuit allowing serious current flow, and potentially starting a fire. So I needed to also add more versatile protections such as removable fuses. I also added a single current meter that read the total load on the battery using a single shunt.

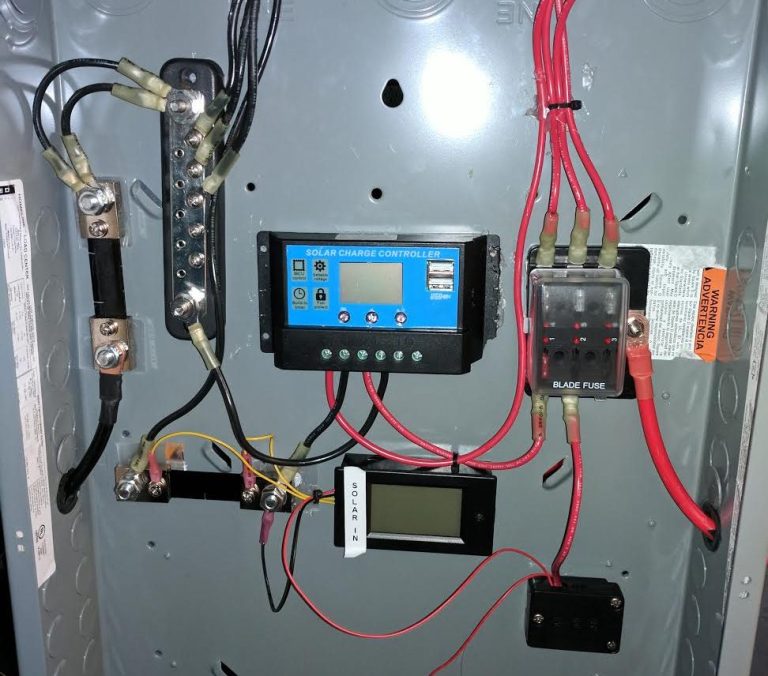
The Fusebox serves the most important role in this power distribution system.


You may note two oddities. The first being the black wire connecting to the fuse box. This has nothing to do with polarity, it’s just the landscape wiring that connects to the lights which are not dependent on polarity. Secondly, I connected the charge output from the charge controller back into the fusebox to charge the battery instead of just connecting directly to the battery bank. This allows for there to be some level of protection if the PWM charge controller fails to cut power at the correct voltage. I’m honestly not sure how or if that can happen, but you can’t be too careful.

The next logical expansion was to allow for the powering of A/C components using an inverter. There are two ways of going about this – Connecting directly to the panel, or backfeeding into the grid. Since I didn’t have a grid-tie off, I opted to be totally isolated. There are ways of getting around this (see self-islanding microinverters which sync to the sin wave of the grid and then output into your house via a suicide plug) however these are of questionable legality and certainly against SDG&E’s rules.


Inverter added to the test setup


Inverter for AC power

As you can see, I added a 1000W inverter (Yes far more powerful than I needed). I fused it at the rating of the wire so it would blow far before reaching enough current to be hazardous. I also added a switch for the lights.

Because of the growth in complexity, I needed some kind of common return for the ground. I had started using the shunt for this, placing things I didn’t want measured on the final bolt of the shunt. However, this became unsustainable and had started to look very cluttered. So I knew I had to once again expand the system to include a common negative bus.


Another issue that presented itself is the fact that the amp-meter is one directional. This meant that if the panels were receiving energy while powering something, the meter would get stuck at zero as the net movement of power to the batteries is positive. I had initially solved this by putting the solar power ground after the shunt measurement. This only moved the problem, as now I had no idea how much power the panels were delivering.


I explored a few ways to fix this, such as a relay that switches the connections on the shunt when it detects power in the other direction or perhaps a new meter all together. However, I thought for cost, time and diagnostic reasons it would be advantageous to have two meters. One for incoming solar power, and one for all the draw on the entire system.

Final Prototype configuration before being moved into the metal enclosure.

For some odd reason I was unable to use a common shunt here. I figured if I reversed the sensor connectors on the shunt it would measure the reverse amperage. It just seemed to give me gibberish readouts. Not sure what was going on there…? I ended up giving up and just using two.


Enclosure and battery cart


Leaving the wooden testbed

After this was done I realized that having so much electrical equipment screwed and glued into wood is a pretty large fire hazard. I decided I needed to quickly rectify this. Around this same time, I began toying with the idea of making the entire setup portable. Thus I settled on the only logical conclusion: A

service cart with an electrically isolated conduit box. I also bought two more 100AH batteries. Bringing the total up too 3 12V 100AH batteries. Or 3600W

 ,                            Final Result


It turned into a project to make a solar ‘crash cart’ able to sustain an area with a loss of power quickly.

Updated: August 11, 2019 — 1:00 pm

Neuron Hosting

Neuron Hosting – An early venture

Please be aware, this was almost 8 years ago so this article is a little bit short and vague as my memory of it is no longer perfect. Do not hesitate to email if you have any questions. 


NeuronHosting

It was my second year of High School and I was about 17 at the time. NeuronHosting was my second project involving server hosting. It provided Minecraft server hosting using MCraft and WHMCS as the back-end to allow for automatic server creations instantly. NeuronHosting started with rented servers from a company called SecuredServers. Eventually managing servers physically to save on overhead became a necessity as NeuronHosting filled a third rented node.


A contract was signed with ScaleMatrix for a half-rack and NeuronHosting began purchasing servers. Minecraft was RAM bottlenecked, so I bought cheaper, used servers off eBay that had OK CPU’s but high RAM. This allowed for the most minecraft instances, while still preforming well while still being fiscally viable.


The server equipment


The Blue Ethernet cables provided a main internet connection, and the grey cables provided a secure internal network which was never utilized.


NeuronHosting was an interesting look into the way companies operate. I wish I had more to write about it, but its been such a long time and I didn’t preserve too much information on it. I intend on updating this post with more information periodically.


At its peak NeuronHosting had 300 simultaneous minecraft instances running at a time, connecting thousands of players.

Updated: September 9, 2018 — 11:45 pm

Amazon Safe Aurduino Control


Cracking and Reusing: An Amazon Basic Safe

The story starts with a locked Amazon Basic safe. I couldn’t find the key anywhere, and although I was almost 99% sure it was empty, I just wanted to be safe. I tried the common ballpoint pen trick to try to jimmy it open but that failed.

I tried the drop and open technique where the safe is supposed to be opened as it falls. This is supposed to let the lock outside of the catch. That also failed for me.


Breaking into the safe

Initially, I had lost both the key and combo to the safe and wanted to get inside. I tried the normal/useless ways of getting in such as prying, dropping an opening to try to catch the latch and more. At one point I tried jamming the barrel of a ballpoint pen into the cylindrical lock after hearing reports of it working on Amazons own reviews. For a little while, it felt like I would never be getting into this safe.

However, once I took a moment to think about the situation getting inside was much easier. I figured that there’s a powered electromagnet for the clasp (as there were reports online about strong magnets unlocking them). Therefore there must be some way for it to receive power once the correct code is entered into the panel.

Aha!

I popped off the panel, and… To my dismay, Amazon had prepared for this.  Inside revealed a ribbon cable, which was connected to the matrix for the keypad input, along with three additional power wires for the LEDs. The actual electronics remained inside the door of the safe. They took the time and added manufacturing costs (nearly DOUBLE the length of wire) to ensure that removing the panel would not allow an intruder into the safe.

Unfortunately for Amazon, they neglected something both fatal and obvious. When the front panel is removed, the slot for the ribbon cable is HUGE.

I noticed the back of the PCB and then the connectors. One of these powered the locking mechanism. Using some jumper cables and a 9v battery I was able to open the safe and finally retrieve its contents.


The Idea of a smart lock addition

I decided adding a ‘smart lock’ would be a good idea. With such an addition a safe can do many more checks such as multiple simultaneous pin entry, remote Bluetooth unlocking and even unlocking via the internet is possible. It is actually a very simple project, with the hardest part being the code behind the Arduino as it will also have to handle the screen.

I plan on using an Arduino Tiny to interface with the safe, and a Pi Zero to interface with whatever else. I’m also considering using TensorFlow and this together in a future project for facial unlocking.


Here is a proof of concept sketch

Left – Plans for the Arduino safe. Right – an Early prototype of the safe. Numpad not implemented.

Using a transistor to prevent overdraw on the Pi.

The white blocks are only blocking out an inside joke with a friend. Its not even a funny one.


Please excuse how primitive it looks. Just trying to convey my basic idea. All of this new wiring would be inside the case in a finished one, but for now its out and easily accessible. It allows locking and unlocking of the lock via signaling on a pin on the Arduino unit. Without the screen, the entire setup could be completely hidden and miniturized, even with a Rasperry Pi connected within it.


In progress. Please check here soon for a detailed documentation of the smart safe.

Safe in progress.


Current (Ongoing)


Updated: September 10, 2018 — 12:22 am

Pacific Surfliner – Various Amtrak pictures

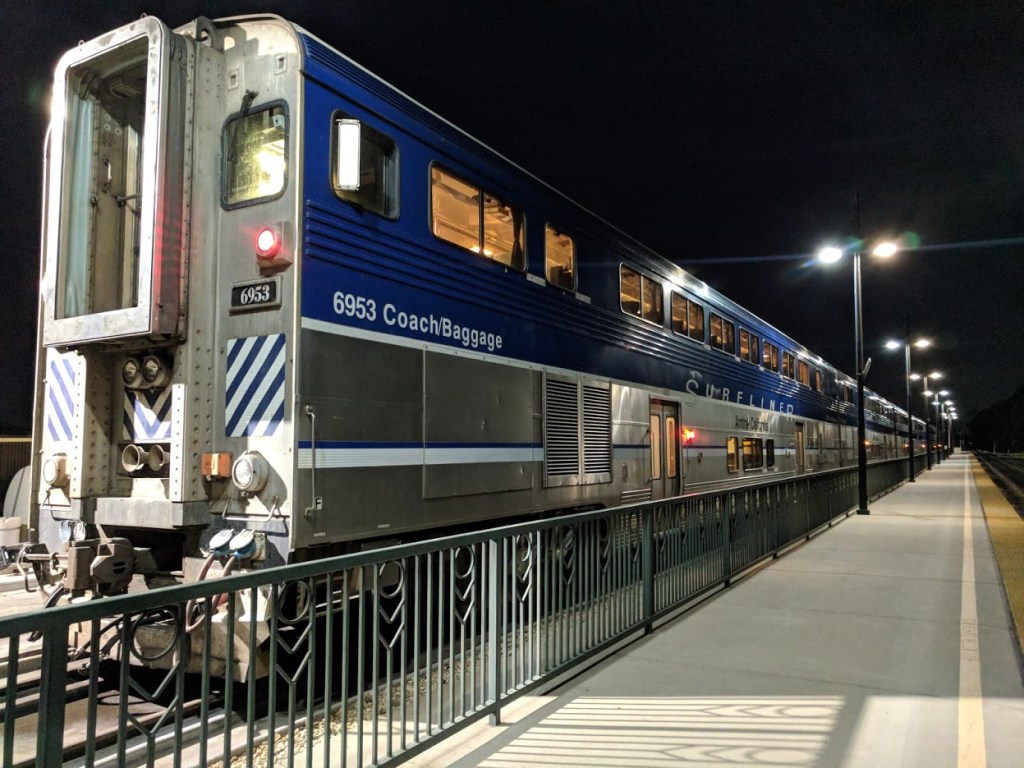
This is a collection of Amtrak Pictures and Videos. Most of them are along the Pacific Surfliner route. It is served with a train set that consists of surfliner and superliner II cars. These were taken with a Google Pixel phone.

Images of Amtrak Pacific Surfliner


Although it has a nice camera, I don’t recommend purchasing the Google Pixel used  because of  [this]. The microphone issue mentioned in that lawsuit has plagued my Pixel, and the one google sent back. I need to research a budget photography camera, including international sources like alibaba and jd.com. In the past they were they first to offer a sub $100 camera option so maybe they offer somthing similar now.